 |
|||
|
|
|||
|
Page Title:
REMOVE/REPLACE PAPER PAN ASSEMBLY |
|
||
| ||||||||||
|
|
 TM 11-7025-233-23
4-37. REMOVE/REPLACE PAPER PAN ASSEMBLY
INITIAL SETUP
Common Tools
q Tool kit
Remove
1. Remove paper shield (para 4-24
Remove, steps 1-6).
2. Remove print head (para 4-17,
Remove, steps 3-10).
3. Remove frame and drive assembly
4. Remove paper roller lever assembly
5. Turn frame and drive assembly upside
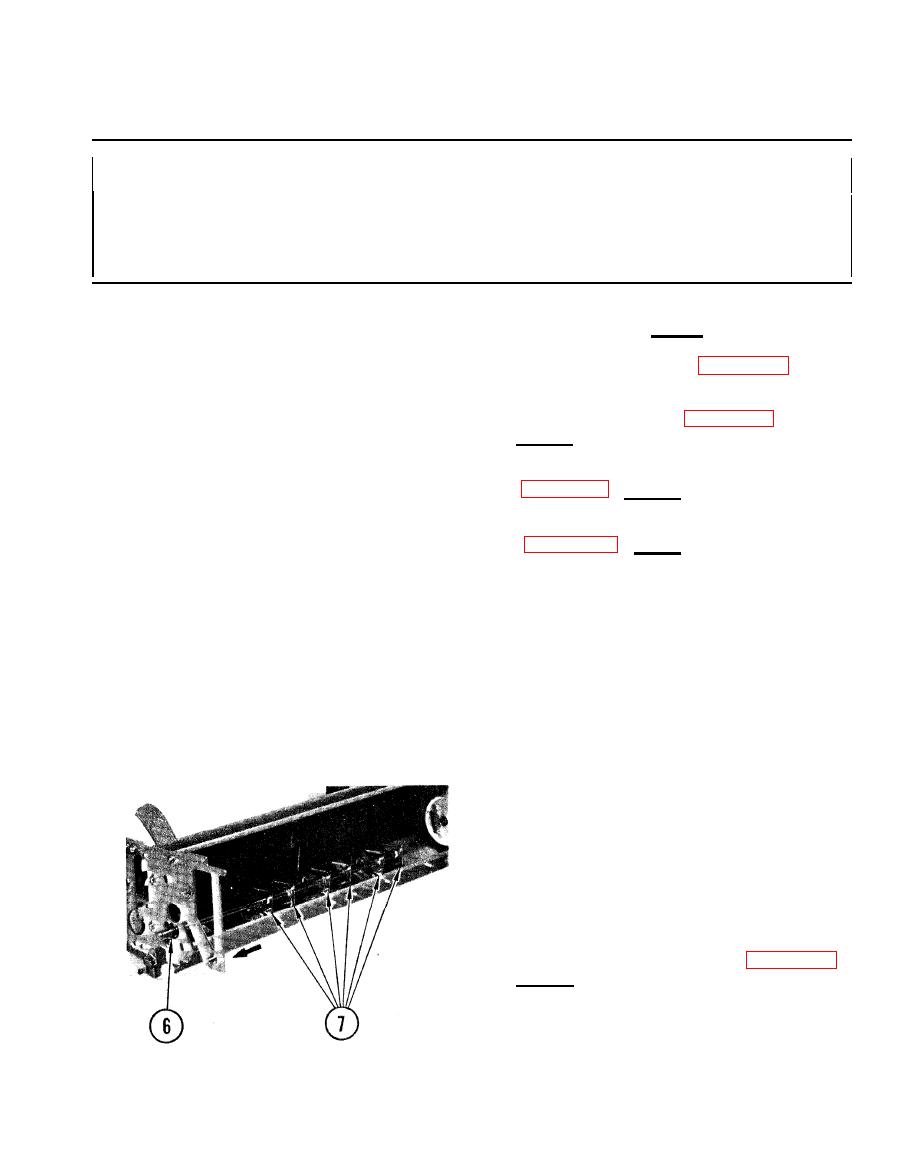
down.
6. Remove retaining rings on pressure
roller rod, one on each side of left
side frame.
7. Carefully work rod out through
pressure roller arms in direction
shown. Pull rod out through left
side frame.
8. Remove carriage assembly (para 4-30,
Remove, steps 3-7).
9. Lift guide rail out of printer.
4-93
|
|
Privacy Statement - Press Release - Copyright Information. - Contact Us |
