 |
|||
|
|
|||
|
|
|||
| ||||||||||
|
|
 TM 11-7025-233-23
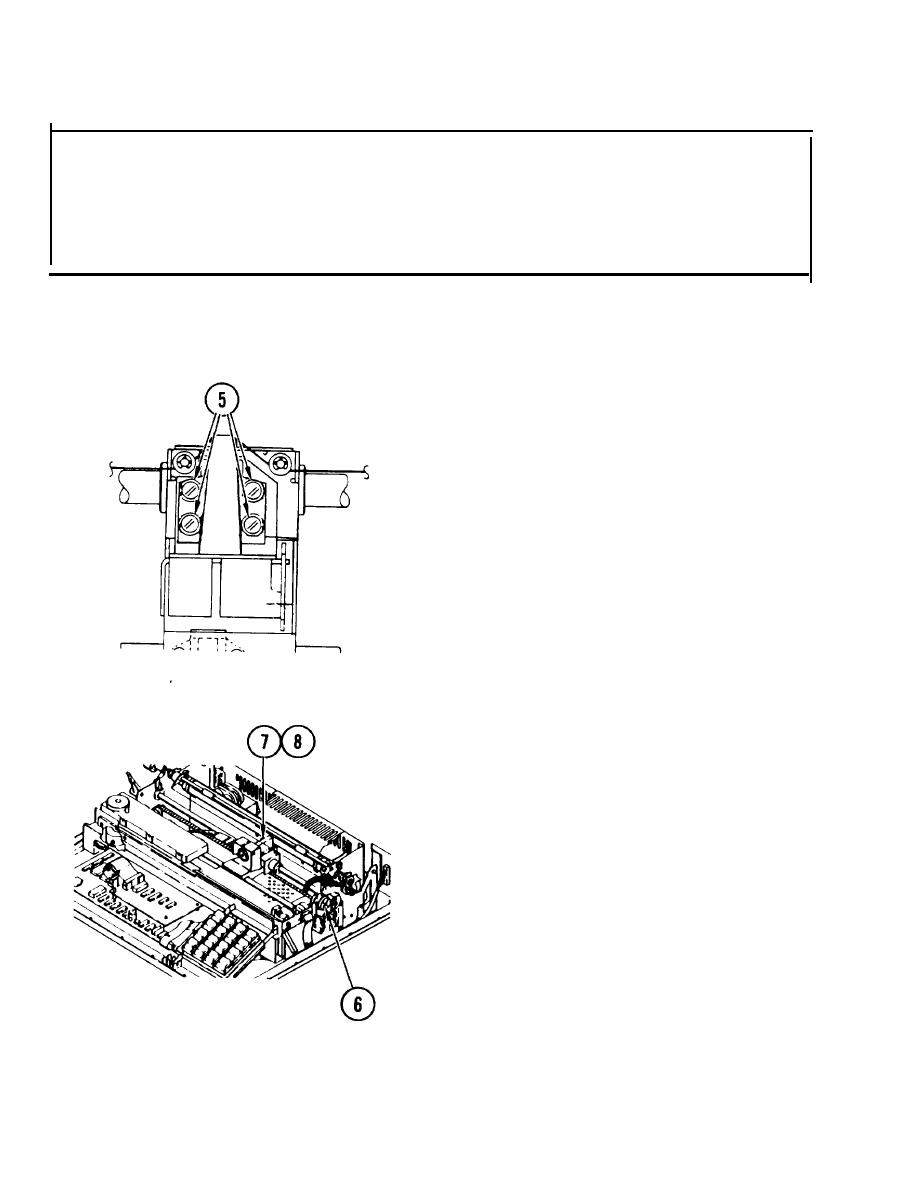
4-18. ADJUST PRINT HEAD
INITIAL SETUP
Common Tools
q Tool kit
4
1. Remove paper.
2. Open front panel.
3. Lift up paper shield.
4. Remove ribbon cartridge.
5. Loosen nozzle clamp mounting screws.
6. Rotate forms thickness knob in
direction shown until print head
moves to fully forward position
(minimum gap).
7. Move carriage to center position.
NOTE
Adjust print head to insure it does
not bind against platen when forms
thickness adjustment knob is set for
minimum gap.
8. Using feeler gauge, set gap between
print head nozzle and platen at
0.010 .002 inches (0.254 .05 mm).
4-48
|
|
Privacy Statement - Press Release - Copyright Information. - Contact Us |
